Means again in highschool, I bought a job at a neighborhood bike store. I used to be shortly positioned underneath the supervision of the pinnacle mechanic, a man named Jeff who sported large sideburns and yellow Converse All-Stars. As soon as I earned his respect, he turned a fully unimaginable mentor in wrenching and in life. What I discovered from him over the course of 4 years, every little thing from wheel constructing to mechanical problem-solving to border restore, has confirmed completely invaluable in serving to each stop and repair all method of issues on backcountry rides and bikepacking expeditions.
Options to probably the most difficult eventualities that may have made Jeff proud introduced themselves. Crank arm retains falling off? Shim it with a little bit of a soda can. Broken air seal in a rear shock? Shrink it ever-so-slightly with a lighter. Cracked chainstay? Splint it with rebar and baling wire.
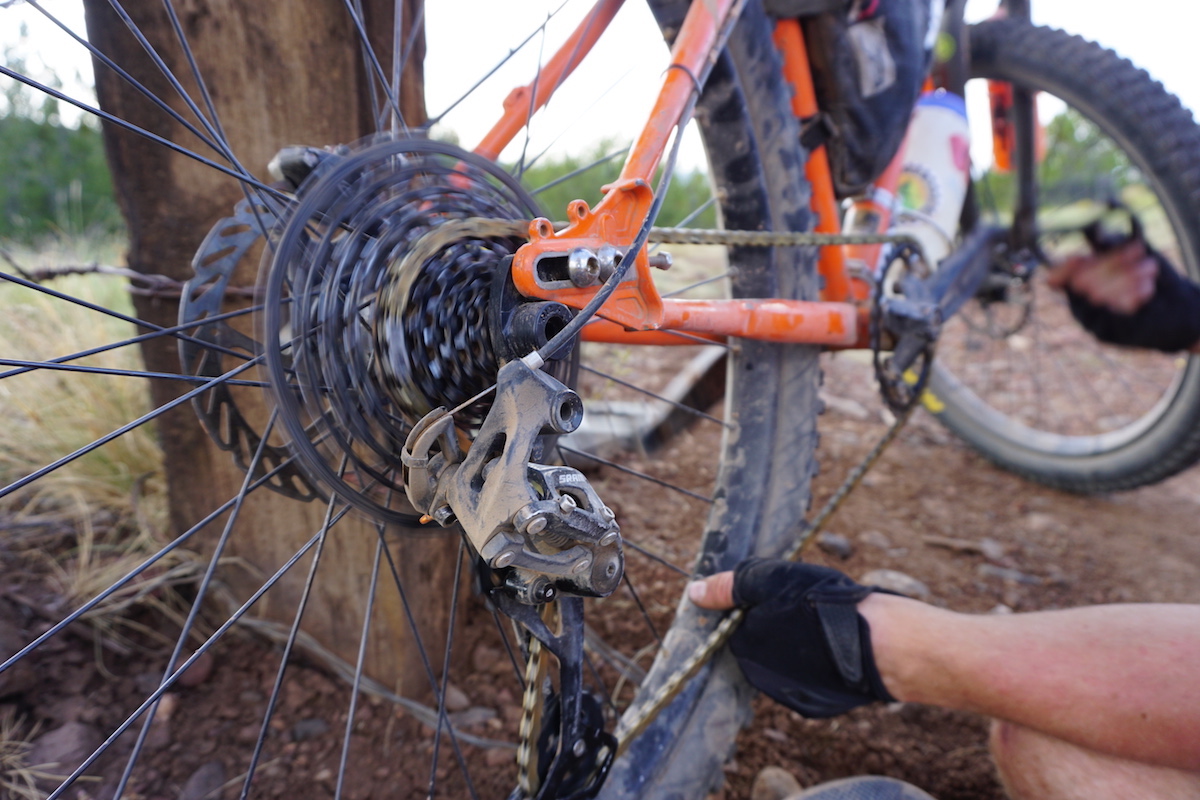
Finish-of-the-day drivetrain upkeep goes a great distance towards maintaining issues clear and working easily.
However not everybody was as lucky to have had a mentor as stellar as Jeff. So many cyclists have minimal background in engaged on their very own bikes, and the prospect of encountering mechanical issues deep within the backcountry is intimidating. I need to share a bit about what might be achieved to reduce these considerations – preventative upkeep, carrying the suitable spare components and instruments (and realizing tips on how to use them), and what primary restore duties are essential to have the ability to do. Extra substantial bike issues might not be repairable within the area, after which limping out and hitchhiking is the possible end result. However more often than not, mechanical issues don’t must imply the tip of the experience.
Maybe the best strategy to keep away from vital bike issues within the backcountry is to be sure that a motorbike is in good working order earlier than placing out on the path. Give the bike a fast once-over. Test all of the bearings for play, slop, crunchiness, or extreme friction – the crankset/backside bracket, hubs, headset, and pedals. Usually occasions, looseness in any of these bearings will create a rattle, so bounce the bike on the bottom firmly and hear for any rattles. Additionally verify for any play or rattle in suspension forks and rear suspension linkages. Spin the wheels, verify for roundness, and really feel all of the spokes to ensure none are notably free. Look over the tires for any indicators of injury. Examine brake strains and shift cables and housing for any harm, kinks, or cracks. Run by means of the shifting to be sure that the derailleur(s) are functioning correctly. Peer into the brakes to confirm that the pads have ample materials remaining. Test all of the bolts on the bike for snugness, and when you’ve got a series checker, see how a lot life is left within the chain. If something irregular exhibits up in these checks, maintain it earlier than the experience.
As soon as out on the path, a cheerful bike will proceed being so with some common common upkeep, and this turns into essential on multi-day journeys.
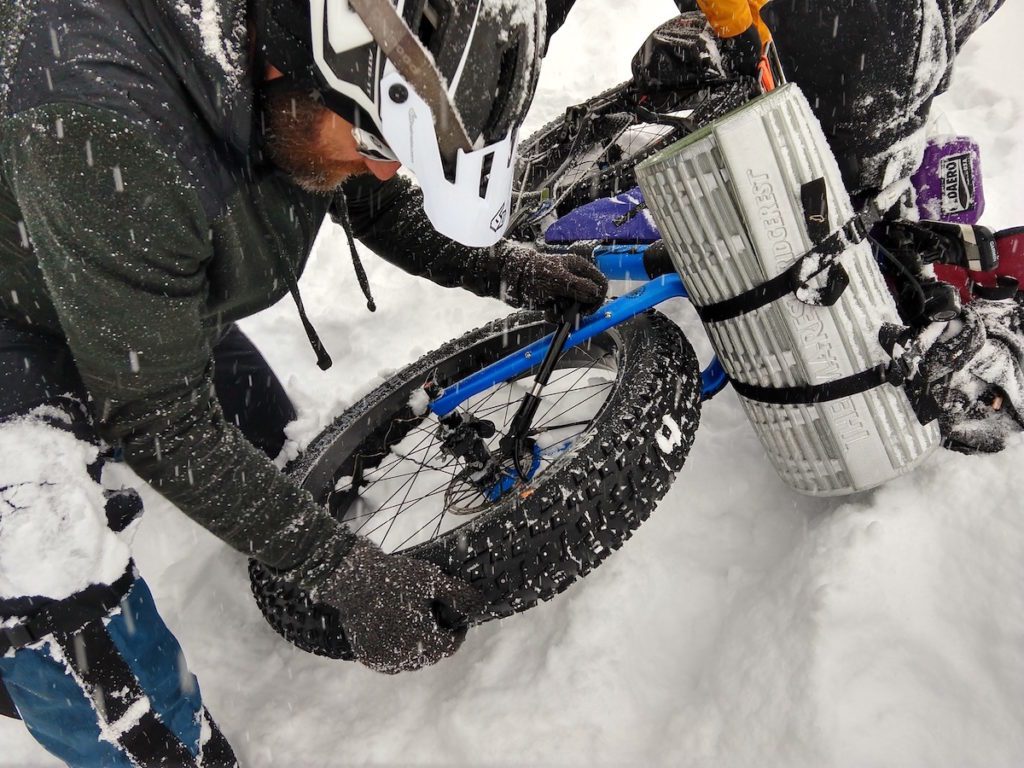
Studying tips on how to handle tire issues is way simpler in a workshop than within the snow.
I verify tire and shock strain each morning, simply by really feel, to be sure that nothing misplaced air in a single day. I carry a rag and stiff brush to maintain the drivetrain as clear as attainable and use each each time I lubricate the chain. I additionally look over the bike shortly not less than as soon as a day, checking virtually every little thing talked about above. And if something on the bike begins sounding or feeling notably completely different from regular, I cease immediately to diagnose the issue. Often, it’s simply one thing like a webbing strap bouncing alongside on the tire or one thing hitting the body. However sometimes, a rattle has turned out to be one thing a bit extra problematic like a lacking brake caliper bolt or a damaged spoke.
For extra distant backcountry rides and bikepacking adventures, my device and restore equipment is bigger than what I keep it up regular day rides, however it’s nonetheless comparatively small. Right here’s what I’d suggest carrying:
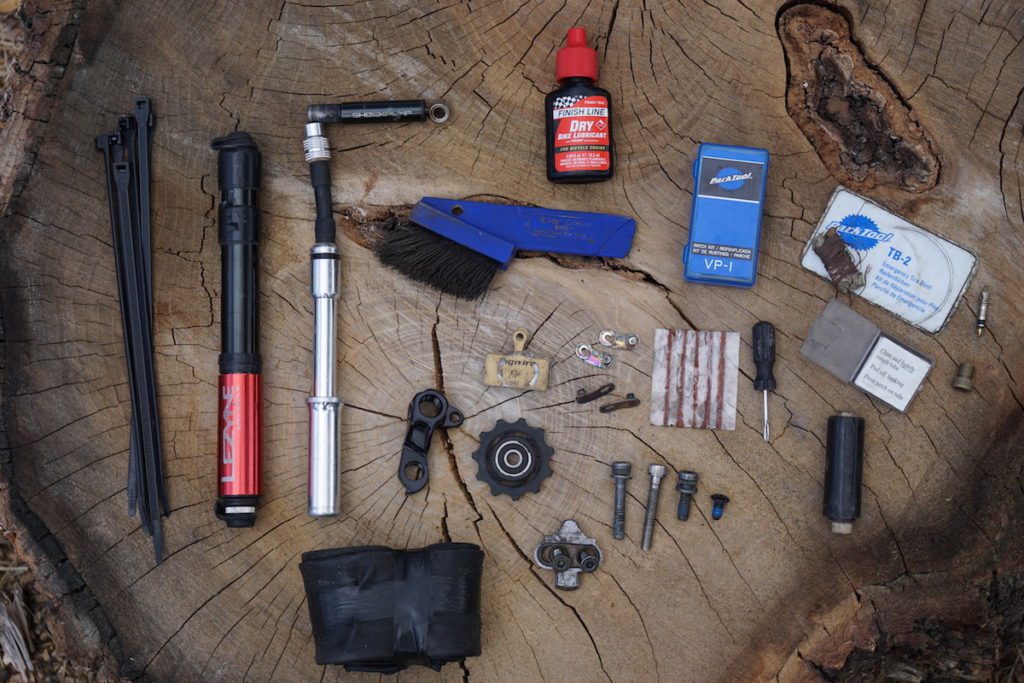
The contents of Kurt’s typical bikepacking restore equipment.
• A motorbike multi-tool (with chain breaker) that each matches and reaches each bolt on my bike – I significantly just like the very useful Blackburn Huge Swap and the Crank Brothers M19 and F15 instruments
• One other small multi-tool with a knife, file, and pliers – that is helpful for every little thing from making dinner to stitching tires to eradicating a valve core
• Tire pump – the Lezyne Strain Drive (the small mannequin) could be very packable and can be utilized to inflate suspension as much as 120 psi
• Small shock pump – the Birzman Zama is my present favourite, however there’s a smooth spot in my coronary heart for my minuscule however nonetheless efficient four” pump scavenged from an outdated Blackburn Toolmanator multi-tool
• 1-2 tubes relying on the size of the journey
• Tire lever
• Tire plugs
• Small roll of Gorilla tape
• Thick needles and fabric thread
• Spare valve core or stem
• Presta valve adapter – good for re-seating tubeless tires at gasoline stations
• 10+ glueless patches; for colder journeys with temperatures <40 °F, glue-on patches are higher much more dependable
• 2 Park self-adhesive tire boots
• 1-2 pairs of spare brake pads
• 5+ thick zip ties
• 2-Three fast hyperlinks and an additional little bit of chain
• Spare derailleur hanger
• RockShox Enduro Collar or Wolf Tooth Valais Clamp if working a dropper put up, simply in case the dropper refuses to remain up
• Spare cleat and mounting bolts
• Chain lube, cleansing brush and rag
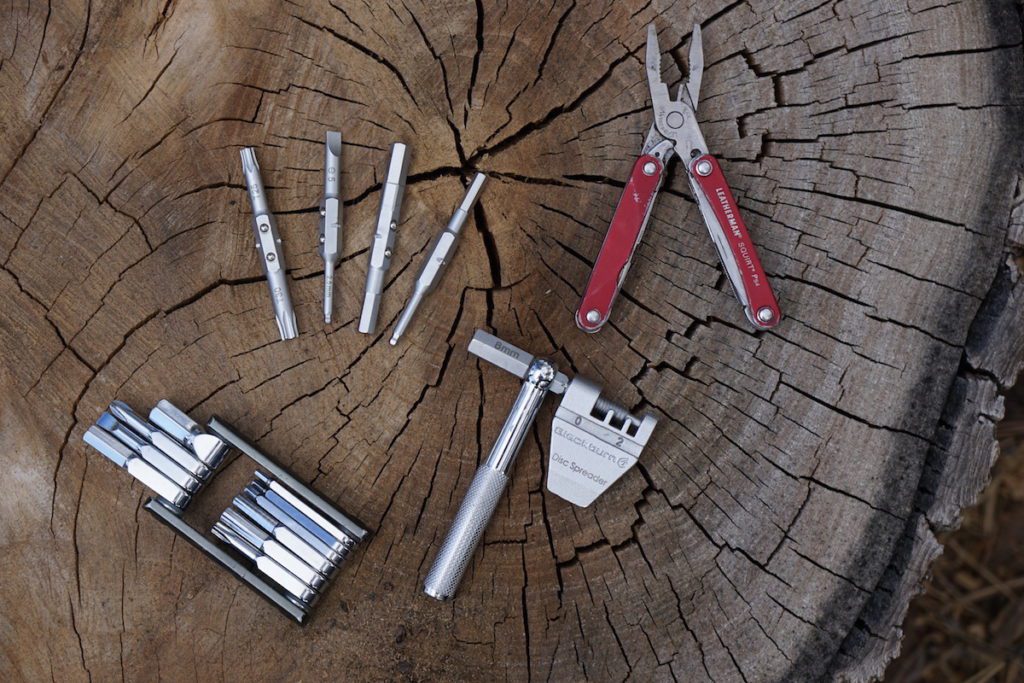
A number of of Kurt’s favourite multi-tools – the Blackburn Huge Swap and the Crank Brothers F15
For longer or extra distant journeys, I additionally will take into account including within the following:
• Spare brake caliper bolts (these rattle out sometimes)
• A number of different miscellaneous bolts particular to my bike
• Spare derailleur pulley and shift cable (for actually lengthy journeys)
• 2 spare spokes with nipples (taped to seatstay)
• Small bottle of tire sealant (for lengthy journeys solely)

Razor sharp limestone positive left a mark, however stitching up and booting this tire was all that was wanted for getting by means of the ultimate 2 days of the journey.
Flat tires are by far probably the most frequent bike drawback confronted by many mountain bikers. Most riders can pull off a tire, pop in a tube, and get it aired up in case of a flat (at all times bear in mind to verify the within of the tire for thorns earlier than tubing it up!). However bigger holes or slices in a tire could require a bit extra labor. On an outdated tire, observe putting in tire plugs. These are completely magical for shortly fixing tire punctures in each the tread and alongside the bead within the case of a pinch flat. Additionally strive booting and/or stitching up a sliced sidewall. That is an all-to-common tire harm when driving a loaded bike on rocky trails, however stitching up a slice with a thick needle and fabric thread could make the tire utterly useable once more. Typically, stitching a boot to the again of the slice may even enable the tire to be returned to tubeless.
Follow changing a derailleur hanger and adjusting the shifting on a rear derailleur. Make certain to grasp the distinction between adjusting shift cable rigidity and the restrict screws – many poorly-adjusted derailleurs are the results of somebody mistakenly altering restrict screw place as a substitute of cable rigidity.
On an outdated chain, be sure that your palms are robust sufficient to interrupt it open along with your multi-tool. I typically have to make use of my mini pliers for extra leverage. Then put the chain again along with a fast hyperlink for observe.
Be capable of change brake pads, unfold the caliper pistons out, modify the caliper place relative to the rotor, and straighten a bent rotor. All are surprisingly easy duties after only a little bit of observe.
Like so many different issues in life, the extra observe and expertise one has sustaining and repairing bikes, the simpler and fewer demanding the duty will turn into.
Plus, it may be kinda enjoyable repairing your bike trailside.